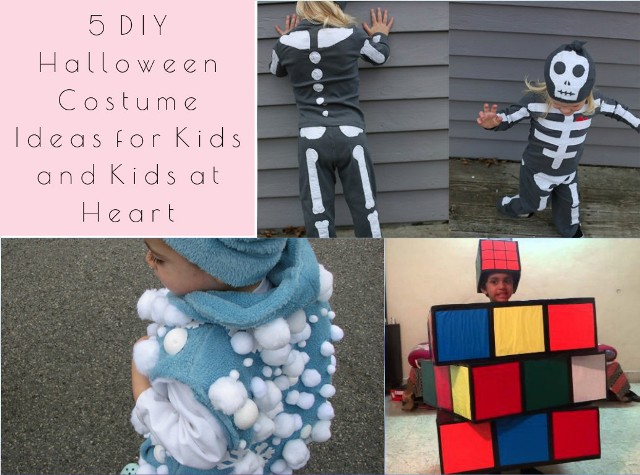
Excited for some Trick or Treat this coming Halloween, but still having a dilemma on what to wear? Here are some do-it-yourself costumes that you and your kids will definitely enjoy making!
Snowball Costume – It is beginning to look like Christmas, but not just yet. This is a two-time costume that you can wear on Halloween and Christmas – practical! So, are we ready to turn the Halloween into a lighter one?
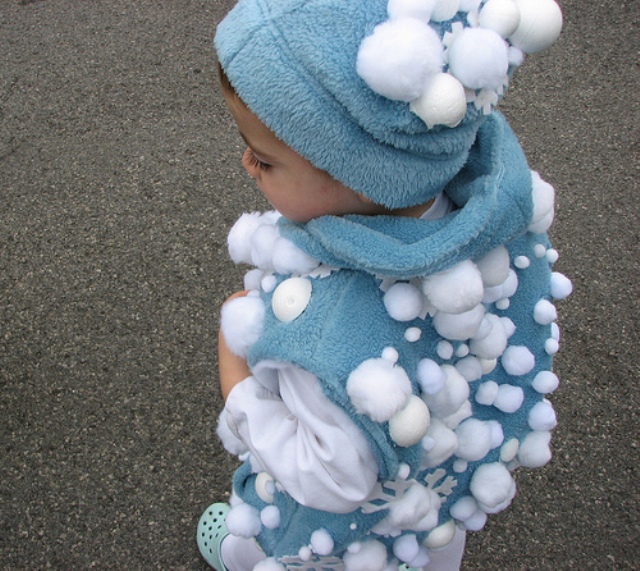
Photo: Bauer Family
Here’s what you will need:
• An overall white bodysuit (if this is not available, just wear a white fit shirt and white pants)
• A pastel blue sleeveless hoodie
• Styro-balls
• Glue gun
• White footwear
• Pastel blue beanie
Here’s what you will do:
1. Get your glue gun (be careful) and put some styro-balls in pastel blue jacket
2. Put some on top of your beanie’s, too
3. Set aside and wait until the styro-balls are glued
4. Wear your white overall, top that with your sleeveless hoodie and beanie
5. Don’t forget your footwear and you’re good to go!
Rubix Cube
– Ever wondered how rubix cubes were being completed? Or, just wondering the tricks on how to complete it? Wonder no more as you and your kid can be a living rubrix cube!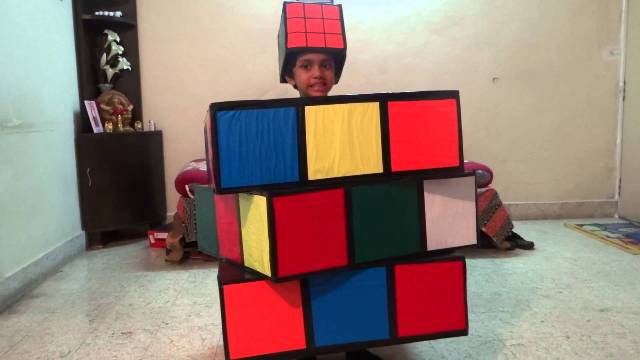
Photo: Pinterest
Here’s what you will need:
• A big box (the size of the box will depend on the size of who will use it)
• Cardboards
• Scissors
• Electrical tape
• Glue gun
• Acrylic paints (red, blue, green, white and yellow)
• Cutter
• Pencil
• Black overall bodysuit
Here’s how you will do it:
1. Get the cutter and cut the bottom part of the box
2. After cutting the bottom part, draw a square on both sides of the box (this is where you will put your arms afterwards) and cut it as well.
3. After cutting the sides, get a pencil and draw a circle at the top most part of the box. This is where your head will pop out afterwards.
4. Once done, get the cardboards and cut it into square; make at least 42. This is going to be the body of your rubix cube costume.
5. Get your acrylic paints and paint the cardboard tiles; 9pcs each color.
6. When the tiles are dry, get the glue gun and glue it one-by-one on the box (be careful with the glue gun.) Also, remember the square you cut on both sides and at the top? Don’t put tiles there. Let it dry.
7. When the glue is dry, get the electrical tape. Put tape on all edges of the tiles.
8. Make sure that all the tiles are glued so, it won’t drop while you are walking.
9. Wear your black overall bodysuit and be the cutest rubix cube ever!
Russell and Carl from UP – Remember the movie UP? Yes, the one from Disney! If you love this movie, you might want to re-create it! This is a very good bonding, too, for daddy and baby (while mommy is the one taking the pictures. We love you mommy!)
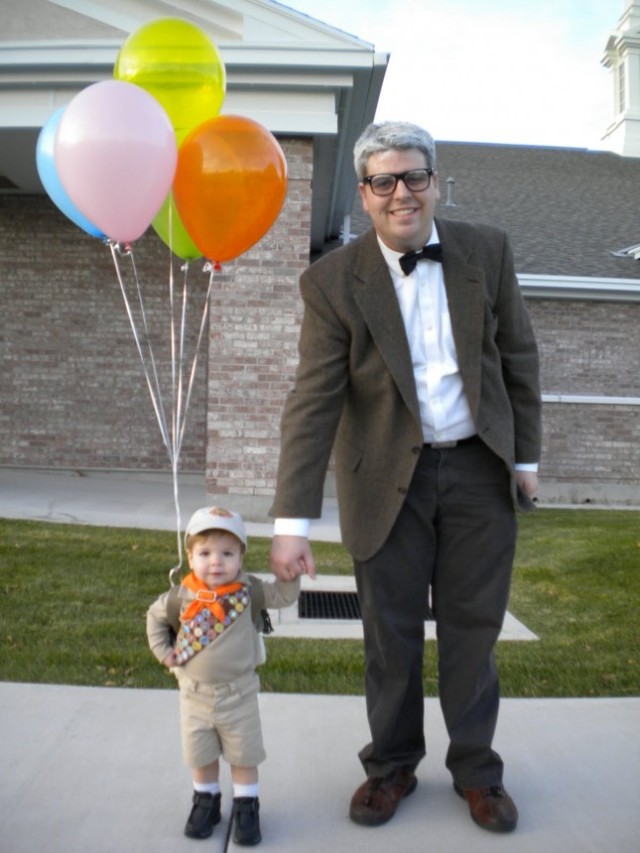
Photo: Pinterest
Here’s what you will need:
For Russell:
• Yellow polo shirt
• Brown shorts
• Black shoes and colorful socks
• Brown cap
• Brown cloth
• Balloons
• Backpack
• Orange Handkerchief
• Lotsa lotsa circle pins!
Here’s how you do it:
1. Wear the yellow polo shirt, brown shorts, colorful socks and black shoes
2. Get the circle pins and pin it to the brown cloth. Don’t put a lot of circle pins, tho. The brown cloth will serve as Russell’s “sash.”
3. Put the brown cloth. Put it diagonally on to your body. Secure it pins (be careful!)
4. Tie your balloons onto the backpack.
5. Don’t forget to put your orange handkerchief around your neck, but make it a little bit loose.
6. Put on your backpack and be the cutest Russell at the party!
For Carl:
• A grey coat, while longsleeves, black slacks
• Bowtie
• Square eyeglasses
• Temporary hair color (the white one)
• Stick and black crepe paper
• Black shoes
• Glue
Here’s how you will do it:
1. Wear your slacks, polo, coat, bowtie and shoes
2. Get the stick and black crepe paper
3. Wrap the stick with the crepe paper using the glue. (This is going to be your cane)
4. Get the temporary hair color in white and spray it onto hair.
5. And lastly, wear your eyeglasses.
6. Now, go and get Russell!
Rain Cloud – Our country might be near the equator and often times we experience longer day than night time, but we are not exempted from rain. Europeans might hate it, but we, Filipinos love it. And, I bet your kids will love it, too! Start dancing in the rain with this lovable rain cloud costume!
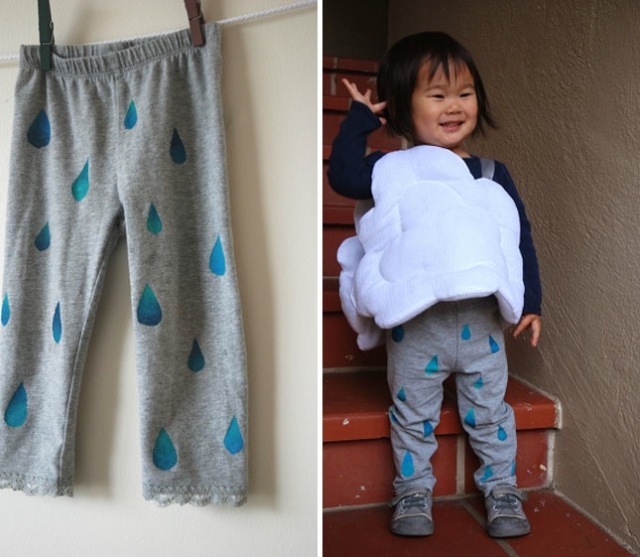
Photo: Pinterest
Here’s what you need:
• Gray leggings
• Acrylic paint (Blue) and paint brush
• 2 pcs cardboard
• Cotton
• Glue
• Garter
• Scissors
• Pencil
• Black overall
Here’s how you will do it:
1. Get the cardboard and draw a cloud on the white side of the board. This is going to be your guide in cutting it.
2. Afterwards, get the scissors (be careful) and cut your cloud drawing
3. Get all the cottons and start gluing it on to the board. Don’t stop until you filled up the whole cardboard. The goal is to make it look fluffy as the real clouds!
4. Once done and settled, get the garters and measure it on to the shoulder of whoever will wear it; cut according to height size, glue it and set aside until dry.
5. While waiting for it to dry, get the gray leggings, pencil, paint brush and blue paint
6. Draw a water drop guide overall the leggings; draw as much as you can. It’s your call.
7. Afterwards, get the blue paint and start painting your water drop.
8. Set aside and let it dry.
9. Wear now your black overall, put on your rain cloud costume and start hosing all your neighbors with cuteness!
Skeleton – What will you do if you see a kid with its skeleton exposed? Pretty creepy, isn’t it? But of course, here in PDM, we want it to be cute and quirky!
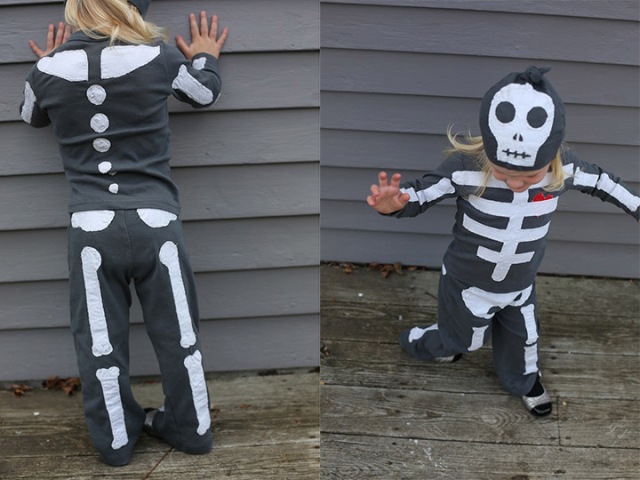
Photo: Blogacart.com
Here’s what you need:
• Black overalls and black gloves
• Felt paper
• Pencil
• Skeleton paper
• Scissors
• Double adhesive tape
Here’s how you will do it:
1. Draw the bones on the felt paper using your pencil. Bones should be for the whole body.
2. Cut the bones. Be careful when using the scissors.
3. Place the cut out bones on your overalls so, you will know how it will look like before taping it.
4. Get your double adhesive tape and start taping the bones one-by-one on to your overalls. Make sure you taped the bones well so, it will not easily peel off.
5. Wear your black overalls and walk like you are just made of skeletons!!
As Halloween is fast approaching, it is better to be ready, but it is also important to weigh your budget. With these simple do-it-yourself costumes, it will definitely be an instant bond with your kids and a little bit of trick or treatin’! Enjoy and don’t forget to share your photos with us!
References and inspirations:
– http://www.brit.co/kids-halloween-costumes/
– https://charlenebirkeland.com/2009/10/08/easy-diy-halloween-costumes-scary-skeleton/
– http://www.parenting.com/article/snowball-costume
– https://www.youtube.com/watch?v=eTf4LJM5wwE
– http://blogalacart.com/2013/10/skeleton-costume-diy/


Leave a Reply